How to Make a Charcuterie Board: Plans, Handle Templates, Live Edges and Food-Safe Finishes
A charcuterie board is the holiday hosting project of the year — quick to make, beautiful to give and a strong seller. Here’s how to make one properly, from wood choice to food-safe finish.
 By WoodCraft Corner Editorial TeamResearched from published sources
7 min read
Beginner Updated Oct 24, 2026
To make a charcuterie board, choose a closed-grain hardwood such as walnut, maple or cherry about 3/4" thick, roughly 8"–12" wide and 16"–24" long. Draw or trace a handle shape, make an MDF template, rough-cut the outline on a band saw or with a jigsaw, then rout the edge flush to the template. Round the edges, sand through 80–220 grit, raise the grain, and finish with food-grade mineral oil and wax. Keep live edges free of bark and away from the serving area, or seal them.
- Use closed-grain hardwoods — walnut, maple and cherry are ideal
- 3/4" thick is the sweet spot: sturdy without being heavy
- A template and flush-trim bit make identical handles every time
- Remove bark from live edges; keep food on the smooth, finished surface
- Finish with food-grade mineral oil and wax, never a film finish on the serving surface


On this page (16 sections)
- Charcuterie board vs cutting board
- Popular board styles
- Choosing the wood
- Step 1: Prepare the stock
- Step 2: Design the shape and make a template
- Step 3: Rough-cut the outline
- Step 4: Rout the edge flush to the template
- Step 5: Round the edges and drill the hanging hole
- Step 6: Sand
- Step 7: Food-safe finish
- Live-edge boards: beautiful, with care
- Design ideas that make boards stand out
- Batch-making boards to give or sell
- Troubleshooting
- Care instructions to give with the board
- Beginner, intermediate, pro
Charcuterie boards have moved from restaurant tables to every kind of gathering: Friendsgiving, office parties, family holidays, game nights. And nothing makes a spread of cheese, fruit and crackers look better than a slab of walnut you shaped yourself. For woodworkers, it’s the ideal seasonal project — one good board, an afternoon in the shop, and a piece that gets used every holiday for years.
Think of a charcuterie board as a cutting board’s more glamorous cousin: it doesn’t need to survive a cleaver every day, so you can choose striking grain, an elegant handle and even a live edge. This guide covers wood, sizes, a template-routed handle, live edges, food-safe finishing and how to make boards in batches to give or sell. It’s part of our small projects that sell hub.
Charcuterie board vs cutting board
| Charcuterie / serving board | Cutting board | |
|---|---|---|
| Main job | Presenting and serving food | Daily chopping |
| Typical thickness | About 3/4" | 1"–1-1/2" |
| Construction | Often a single board | Often glued-up strips |
| Design freedom | Handles, curves, live edges, figure | Simple, durable shapes |
| Finish | Food-safe oil and wax | Food-safe oil and wax |
If you want a board for heavy daily chopping too, see our edge-grain cutting board plans.
Popular board styles
| Style | Typical size | Best for |
|---|---|---|
| Paddle board with handle | 8"–10" × 16"–20" | Cheese and fruit for 2–6 people; the classic gift |
| Long plank | 6"–8" × 30"–36" | Table runners of food, long dinner tables |
| Round board | 12"–16" diameter | Coffee tables and small gatherings |
| Live-edge board | Varies with the slab | Rustic, natural presentation |
| Large grazing board | 16"–20" × 30"–48" | Parties and holiday spreads |
| Board with a lip or rails | Varies | Carrying food between rooms |
The paddle board is the best first project and the most popular gift. The steps below build one, and the same method works for every shape.
Choosing the wood
Use closed-grain hardwoods for anything that touches food. They resist moisture, don’t trap crumbs in open pores and take an oil finish beautifully.
- Black walnut — rich colour that makes food look spectacular; the favourite for serving boards.
- Hard maple — light and clean, shows engraving clearly.
- Cherry — warm colour that deepens with age.
- Figured woods — curly maple or crotch walnut make show-stopping boards.
Avoid open-grain woods like red oak, softwoods, treated lumber and reclaimed wood of unknown origin. Exotic woods can be beautiful but some are known sensitisers. Full guidance in best wood for cutting boards.
Beginner tip: look for a board with interesting grain but no cracks, loose knots or bark pockets in the area where food will sit. One beautiful board beats a glue-up for a serving piece.
Step 1: Prepare the stock
- Choose a board about 1" thick so you can flatten it to about 3/4".
- Check moisture content — dry, stable wood stays flat. See our moisture meter guide.
- Flatten one face with a planer, hand plane or sander, then plane the other face parallel.
- If your board is too narrow, glue two pieces edge to edge with a waterproof glue and match the grain.
Step 2: Design the shape and make a template
A template is the secret to crisp, repeatable shapes — especially handles.
- Draw the full board outline on paper: a rectangle with rounded corners and a handle about 4"–5" long and 2"–2-1/2" wide.
- Fold the paper in half lengthwise and cut both halves together for perfect symmetry.
- Trace onto 1/4" MDF or hardboard and cut it out slightly outside the line.
- Sand the template edges smooth and fair — every bump will be copied onto the board.
- Mark a hanging hole position in the handle.
Step 3: Rough-cut the outline
Trace the template onto the board, positioning the best figure in the serving area. Cut about 1/16" outside the line on a band saw, or with a jigsaw or coping saw. Staying close to the line makes the routing step easier and safer.

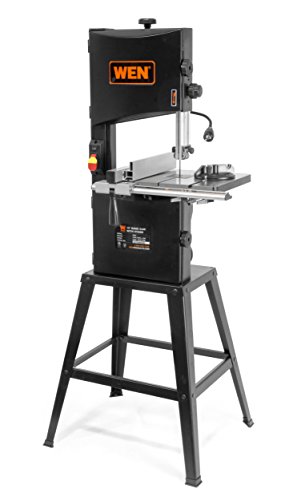
Band saw tips are in our band saw guide.
Step 4: Rout the edge flush to the template
- Attach the template to the board with double-sided tape or a few small screws in the waste of the handle hole.
- Use a flush-trim bit with the bearing riding on the template.
- Rout counter-clockwise around the outside edge (as viewed from above), taking light passes.
- Where the grain runs uphill on curves, slow down or take lighter cuts to avoid tear-out.
- Remove the template.
Clamp the board securely or use a router mat, keep both hands on the router and never rout a small, loose piece. If the board is small, use a router table with a starter pin and a guard. Wear eye and hearing protection.
Step 5: Round the edges and drill the hanging hole
Rout a 1/8"–1/4" roundover on the top and bottom edges, or ease them with sandpaper. Rounded edges feel better in the hand, resist chipping and look finished. Drill the hanging hole with a Forstner bit over a backer board to prevent blowout, and chamfer both sides of the hole.
Step 6: Sand
- Sand faces with 80 or 120 grit to remove machine marks.
- Move through 150, 180 and finish at 220 grit.
- Sand edges and the handle by hand to keep curves fair.
- Wipe with a damp cloth to raise the grain, let it dry and sand lightly at 220 again — the board stays smooth after its first wash.
Technique tips in our sanding guide.
Step 7: Food-safe finish
- Flood the board with food-grade mineral oil on every surface, including the underside and edges.
- Let it soak for 15–30 minutes, then wipe off the excess.
- Repeat two or three times over a day, until the wood stops absorbing.
- Buff on a board wax or oil-and-wax blend for a soft sheen and extra water resistance.
Never use varnish or polyurethane on the serving surface; it can chip and isn’t intended for direct food contact on boards. Compare options in our food-safe finishes guide.
Live-edge boards: beautiful, with care
A live edge — the natural outer edge of the tree — gives a board a rustic, organic look. Treat it properly:
- Remove the bark and any loose inner bark; it harbours dirt and falls off over time.
- Clean the edge with a stiff brush, then sand lightly to smooth it while keeping its natural shape.
- Keep food on the flat surface, not against the live edge.
- Seal or oil the edge with the rest of the board, and check for cracks or voids.
- Stabilise cracks with a butterfly key rather than filling food areas with resin.
Design ideas that make boards stand out
- Contrast handle: a walnut board with a maple strip inlaid across the handle.
- Feet: small rubber or wooden feet lift the board for easy pickup.
- Cheese knife slot: a shallow routed recess holds a small knife.
- Rails: a low strip glued to each end for carrying.
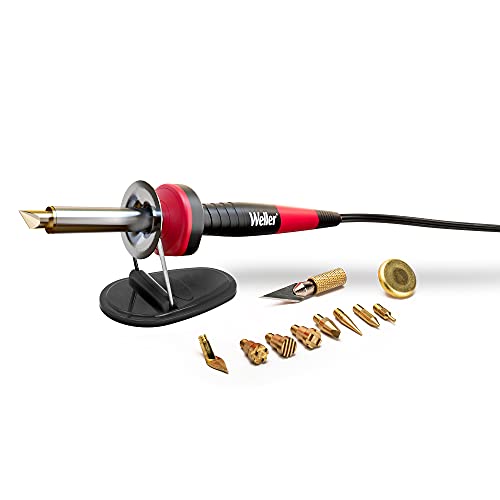
- Personalisation: a family name burned or engraved on the handle — see our laser-engraved gift ideas and pyrography guide.
Batch-making boards to give or sell
Serving boards are among the best-selling handmade items before Thanksgiving and Christmas. Once you have a template, making five boards takes only a little longer than making one:
- Trace the template on several boards and rough-cut them all.
- Rout every edge with one router setup.
- Round over and drill all hanging holes.
- Sand everything at each grit before moving to the next.
- Finish all boards together on a rack.
Offer two or three sizes, and add a bottle of board oil and a care card as a gift set. Price them properly with our pricing guide, and see our craft fair guide for holiday markets.
Troubleshooting
| Problem | Cause | Fix |
|---|---|---|
| Tear-out on curves | Routing against the grain | Lighter passes; rout the problem area from the other direction with care, or sand it out |
| Bumpy handle shape | Template edges not smooth | Fair the template before routing |
| Board warps after finishing | Only one side oiled, or wet wood | Oil all faces; use dry stock; store flat or on edge |
| Fuzzy surface after washing | Grain not raised before finishing | Wet, dry, sand lightly, re-oil |
| Burn marks on edges | Dull bit or slow feed | Sharp bit, steady feed, light final pass |
| Bark flaking on live edge | Bark left on | Remove bark and loose material, then oil |
Care instructions to give with the board
- Hand-wash with warm water and mild soap; never soak or use a dishwasher.
- Dry immediately and stand on edge.
- Re-oil whenever the board looks pale or dry.
- Sand out marks lightly and re-oil to refresh.
Beginner, intermediate, pro
Beginner: a paddle board from a single walnut or maple board, shaped with a jigsaw and sanded by hand.
Intermediate: template-routed boards in batches, with a roundover and engraved initials.
Pro note: large grazing boards from wide, figured slabs. Flatten them on a router sled, stabilise checks with butterfly keys, and add discreet feet so the board never rocks on a table. A matched set — a large board, a small one and coasters from the same tree — makes a premium holiday gift. For more quick builds, see our scrap wood projects.
Questions woodworkers ask
What is the best wood for a charcuterie board?
Closed-grain hardwoods such as black walnut, hard maple and cherry. They resist moisture, don’t trap food in open pores and look beautiful with a simple oil finish.
How thick should a charcuterie board be?
About 3/4" is ideal for most boards — thick enough to stay flat and feel substantial, but light enough to carry. Very large grazing boards can be thicker.
What size is a charcuterie board?
Popular sizes range from about 8" × 16" for a small paddle board to 12" × 24" for a party board. Large grazing boards can be 36" or longer.
Are live-edge charcuterie boards safe?
Yes, if the bark and loose material are removed and food is served on the smooth, finished surface. Some makers seal the live edge or keep it purely decorative.
What finish is safe for a charcuterie board?
Food-grade mineral oil, often combined with beeswax or carnauba wax. Avoid varnish or polyurethane on the serving surface.
Can I put a charcuterie board in the dishwasher?
No. Hand-wash with mild soap, dry immediately and re-oil when the wood looks dry.
Gear from this guide




WoodCraft Corner Editorial Team
WoodCraft Corner is an independent woodworking publisher. Our guides are researched from manufacturer documentation, published safety guidance and established woodworking references, and we update them when sources change or readers report a problem.
0 comments